Category: CoderDojo

Python in Minecraft 6 – stone floor tunnel with torches

In the previous example the tunnel was glass all around. To make a more interesting tunnel this example adds a stone floor and adds a torch. We will develop this tunnel in two stages. The first stage is to create a profile showing what a cross-section of the tunnel will look like for any value of x.

nano tunnelprofile2.py

import mcpi.minecraft as minecraft
import mcpi.block as block
mc=minecraft.Minecraft.create()
x = -190
y = 72
z = -222
mc.setBlocks(x,y,z-2,x,y+6,z+2,block.GLASS)
mc.setBlocks(x,y,z-1,x,y,z+1,block.STONE)
mc.setBlocks(x,y+1,z-1,x,y+5,z+1,block.AIR)
mc.setBlock(x,y+1,z+1,block.TORCH.id,5)

python3 tunnelprofile2.py

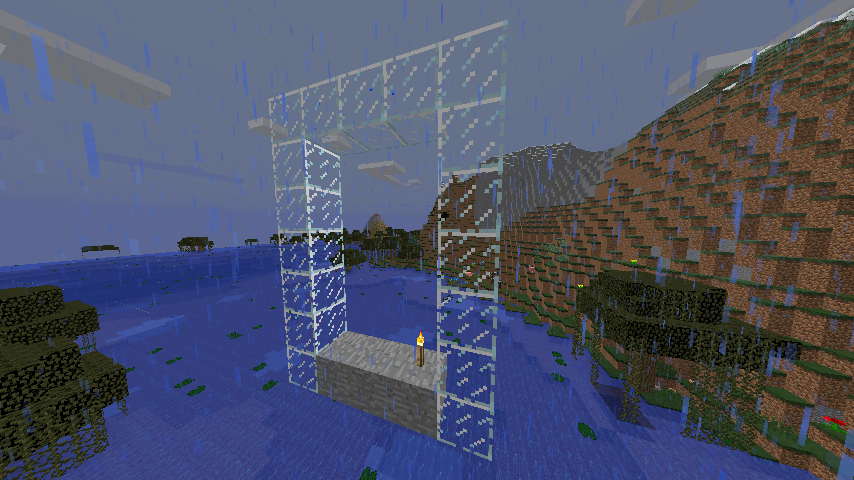
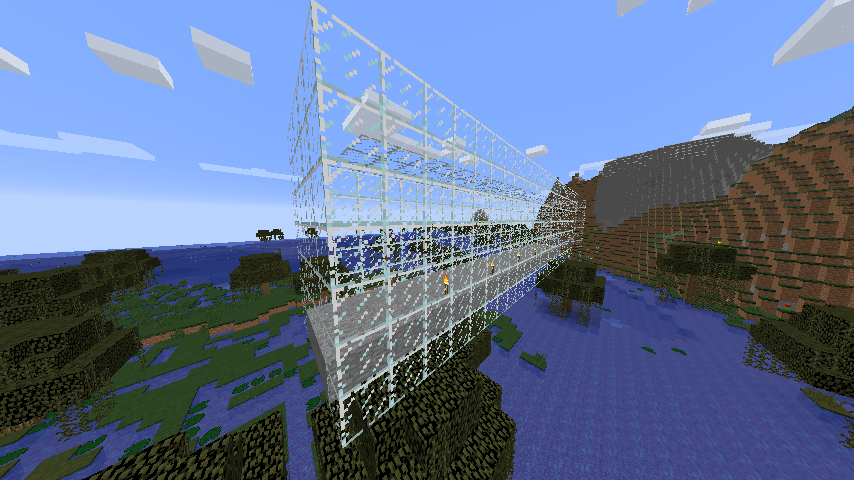
The second stage is to create a loop to draw each cross section of the tunnel at each value of x between xmin and xmax. Note that at the ends we ant the wall of glass to stay so that lava and water don’t flow into the tunnel should it get built next to these liquids. We have achieved this with two loops. The first loop goes the full length of the tunnel from xmin to xmax. The second loop which adds air and torches starts and ends one position in from the ends. Torches are added every 4 positions by using the modulo (%) operator.

nano stonefloortunnel.py

import mcpi.minecraft as minecraft
import mcpi.block as block
mc=minecraft.Minecraft.create()
xmin = -224
xmax = -200
y = 72
z = -222
for x in range(xmin,xmax+1):
    mc.setBlocks(x,y,z-2,x,y+6,z+2,block.GLASS)
    mc.setBlocks(x,y,z-1,x,y,z+1,block.STONE)
for x in range(xmin+1,xmax):
    mc.setBlocks(x,y+1,z-1,x,y+5,z+1,block.AIR)
    if x % 4 == 0:
        mc.setBlock(x,y+1,z+1,block.TORCH.id,5)

python3 stonefloortunnel.py

Categories: CoderDojo

Python in Minecraft 5 – hollow tunnel

Creating a hollow tunnel with walls at each end

To create an air space in the tunnel we can use another loop. However, the second loop should not go all the way to the ends because we want walls at each end. This is to stop water and lava flowing into our tunnel should the ends of the tunnel meet these liquids.

nano hollowglasstunnel.py

import mcpi.minecraft as minecraft
import mcpi.block as block
mc=minecraft.Minecraft.create()
xmin = -224
xmax = -200
y = 72
z = -222
for x in range(xmin,xmax+1):
    mc.setBlocks(x,y,z-2,x,y+6,z+2,block.GLASS)
for x in range(xmin+1,xmax):
    mc.setBlocks(x,y+1,z-1,x,y+5,z+1,block.AIR)

python3 hollowglasstunnel.py

Categories: CoderDojo

Python in Minecraft 4 – Creating a solid tunnel

Our next exercise it to create a tunnel of glass filled with air. Glass is useful because it is transparent. To start with the tunnel will be horizontal heading east which means the x coordinate will be increasing and the y and z coordinates will keep constant values. We could use the setBlocks command for the entire length of the tunnel. However we want to keep the code flexible enough that later on the tunnel could start ascending or descending, i.e. the y coordinate could start increasing or decreasing. The profile of the tunnel which will be a wall of glass 5 blocks across and 7 blocks high. Here is the code to create a profile of the tunnel for one value of the x coordinate.

nano tunnelprofile.py

import mcpi.minecraft as minecraft
import mcpi.block as block
mc=minecraft.Minecraft.create()
x = -200
y = 72
z = -222
mc.setBlocks(x,y,z-2,x,y+6,z+2,block.GLASS)

python3 tunnelprofile.py

A loop can be added which will draw the profile of the tunnel over and over again for a range of different x values. Note how important indentation is in python. I am indenting 4 spaces when in a loop.

nano solidglasstunnel.py

import mcpi.minecraft as minecraft
import mcpi.block as block
mc=minecraft.Minecraft.create()
xmin = -224
xmax = -200
y = 72
z = -222
for x in range(xmin,xmax+1):
    mc.setBlocks(x,y,z-2,x,y+6,z+2,block.GLASS)

python3 solidglasstunnel.py

Categories: CoderDojo

Python in Minecraft 3 – Placing many blocks at once

The previous example showed that python scripts could quickly become very long if each block had to be set individually. Fortunately there is the setBlocks command which can set many blocks at once. It also has two forms.

mc.setBlocks(x1,y1,z1,x2,y2,z2,block)
mc.setBlocks(x1,y1,z1,x2,y2,z2,block.id,variation)

The minecraft coordinates (x1,y1,z1) represent one corner of the rectangular prism about to be set. The minecraft coordinates (x2,y2,z2) represent the diagonally opposite corner. The previous example can be rewritten to use the setBlocks command. The glass is set first otherwise it would overwrite the setting of the middle block. In this example the middle block is air which is equivalent to there being no block.

nano placeglassblocks.py

import mcpi.minecraft as minecraft
import mcpi.block as block
mc=minecraft.Minecraft.create()
mc.setBlocks(-220,72,-223,-218,74,-221,block.GLASS)
mc.setBlock(-219,73,-222, block.AIR)

python3 placeglassblocks.py

Categories: CoderDojo

Python in Minecraft 2 – Placing many blocks individually

In the last exercise we placed a wool block with variation 1. If you want to know which blocks you can place, check out the reference material at

http://www.stuffaboutcode.com/p/minecraft-api-reference.html

In the next example, the same wool block is placed and glass is placed all around it. Glass doesn’t have any variations so we are using the first form of the setBlock command

nano placeglassaroundwool.py

import mcpi.minecraft as minecraft
import mcpi.block as block
mc=minecraft.Minecraft.create()
mc.setBlock(-219,73,-222, block.WOOL.id, 1)
mc.setBlock(-220,72,-223, block.GLASS)
mc.setBlock(-220,72,-222, block.GLASS)
mc.setBlock(-220,72,-221, block.GLASS)
mc.setBlock(-220,73,-223, block.GLASS)
mc.setBlock(-220,73,-222, block.GLASS)
mc.setBlock(-220,73,-221, block.GLASS)
mc.setBlock(-220,74,-223, block.GLASS)
mc.setBlock(-220,74,-222, block.GLASS)
mc.setBlock(-220,74,-221, block.GLASS)
mc.setBlock(-219,72,-223, block.GLASS)
mc.setBlock(-219,72,-222, block.GLASS)
mc.setBlock(-219,72,-221, block.GLASS)
mc.setBlock(-219,73,-223, block.GLASS)
mc.setBlock(-219,73,-221, block.GLASS)
mc.setBlock(-219,74,-223, block.GLASS)
mc.setBlock(-219,74,-222, block.GLASS)
mc.setBlock(-219,74,-221, block.GLASS)
mc.setBlock(-218,72,-223, block.GLASS)
mc.setBlock(-218,72,-222, block.GLASS)
mc.setBlock(-218,72,-221, block.GLASS)
mc.setBlock(-218,73,-223, block.GLASS)
mc.setBlock(-218,73,-222, block.GLASS)
mc.setBlock(-218,73,-221, block.GLASS)
mc.setBlock(-218,74,-223, block.GLASS)
mc.setBlock(-218,74,-222, block.GLASS)
mc.setBlock(-218,74,-221, block.GLASS)

Run this python script to see it build in minecraft

python3 placeglassaroundwool.py

Categories: CoderDojo