Using PyCharm with Anaconda
There are a few tricks to getting PyCharm to work with Anaconda. This post demonstrates running a flask web application on Windows 10 with the only Python installation being Anaconda. The source code we will use is a git repository so you will need git installed to proceed. (see https://git-scm.com). The screenshots use PyCharm Edu which is the same as PyCharm Community with the edu-tools plugin. You don’t need this plugin. Also, we do not have the Anaconda plugin which I think is only available for PyCharm Pro.
To begin, run PyCharm. You may need to close any open projects to see the splash screen. (File menu > Close project).
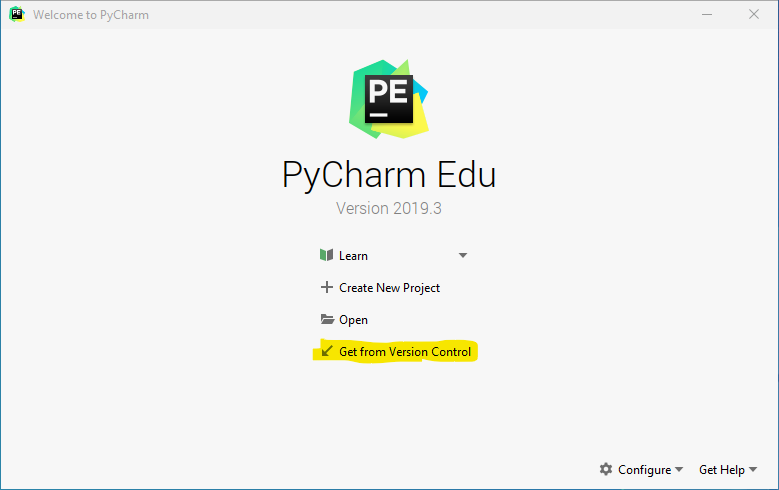
1. You can clone a git repository straight from the splash screen. Click “Get from Version Control”
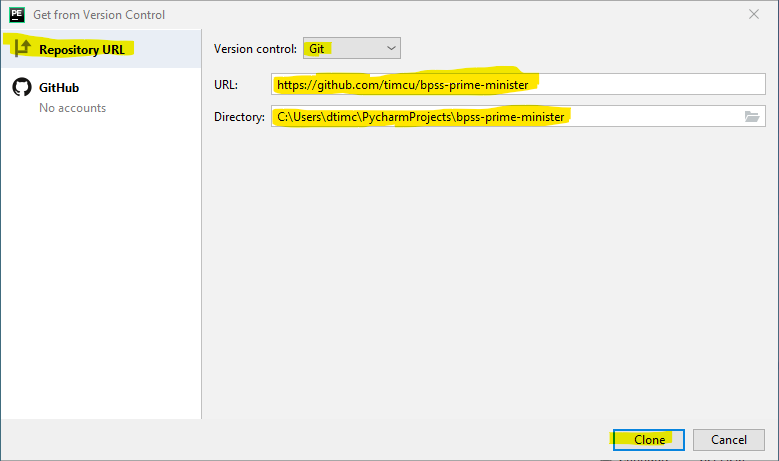
2. Select “Repository URL” and fill in the details of the repo on github.
Version control: Git
URL: https://github.com/timcu/bpss-prime-minister
Directory: C:\Users\<username>\PyCharmProjects\bpss-prime-minister
Click “Clone” to clone the repository

3. Click “Yes” to open the project directory in PyCharm.
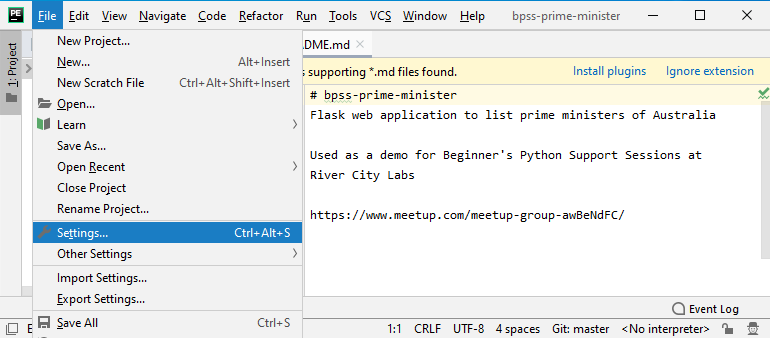
4. Now you need to configure PyCharm to use an Anaconda virtual environment. This is done in “File” > “Settings…” in Windows/Linux or “PyCharm” > “Preferences” in Mac.
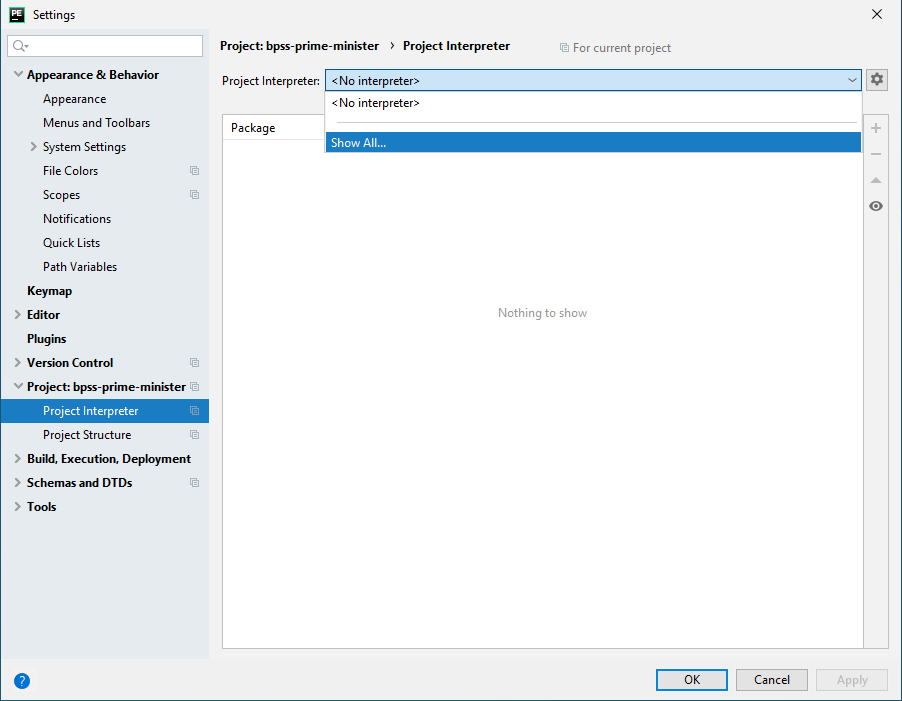
5. In settings, select the Project Interpreter for this project. As this is the first project, no Interpreters are currently set up. Click on “Show All…” in the Project Interpreter pull down menu.
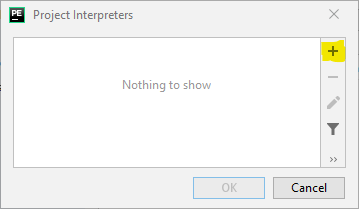
6. The list of Project Interpreters is empty, so click on the “+” to create a new one.
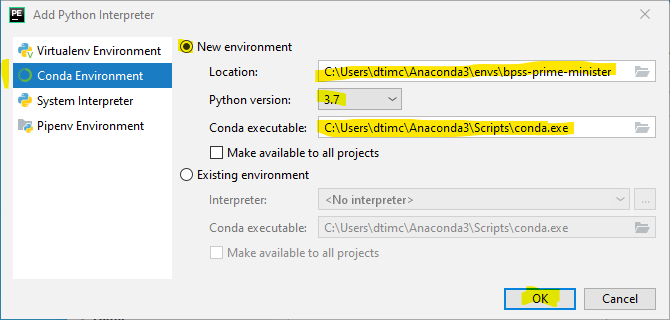
7. Be sure to select “Conda Environment” in the left panel. If you were using Python without Anaconda you would select “Virtualenv Environment”. Selecting “System Interpreter” is not best practice because you will pollute the system python installation with custom modules making it difficult to replicate environments on different computers. “Pipenv Environment” is for those who prefer using pipenv to manage environments. This is more a legacy requirement as “Virtualenv Environment”, which these days uses venv rather than virtualenv, can do anything pipenv can do.
Conda environments are stored in the Anaconda root directory. I installed Anaconda for my use only so this directory is C:\Users\<username>\Anaconda3 . If you have installed Anaconda for all users it will probably be C:\Anaconda3 .
The conda environment can be called anything you want but I normally call it the same name as the project so I know what it is used for. In this case I have named it “bpss-prime-minister”.
Click “OK” to create the new conda environment. Then click “OK” on the “Project Interpreters” window to return to “Settings”.
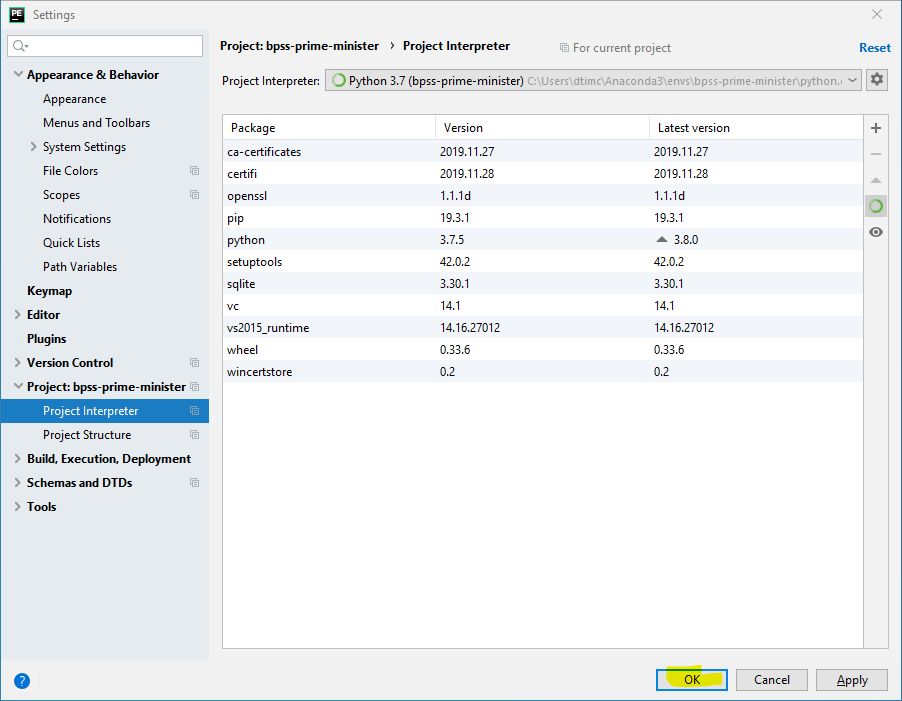
8. Click “OK” ensuring the newly created environment is now selected as the Project Interpreter in the pull down menu.
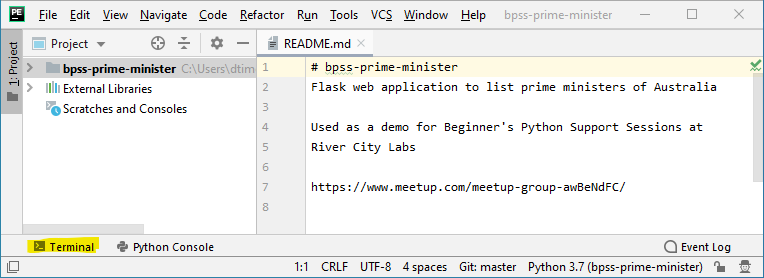
9. Open Terminal pane by clicking on “Terminal” in the bottom left of the project window.
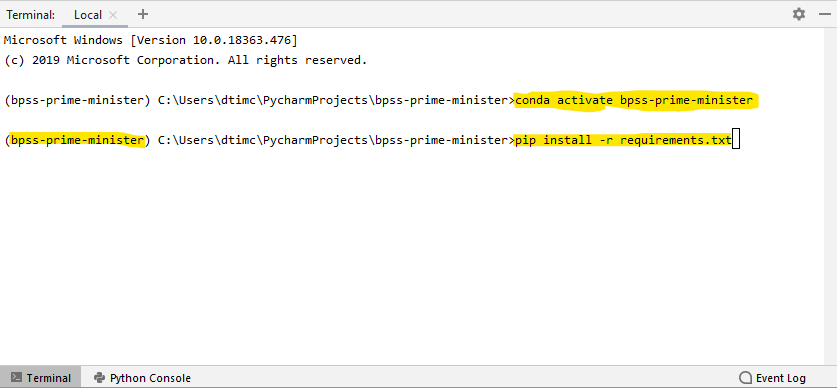
10. In the future, when you open Terminal, it will automatically activate the correct conda environment. It may even activate it now as it has done for me in the screenshot. However, if you opened Terminal before creating the environment, it will be using base environment, indicated by (base) at the beginning of each prompt in Terminal. Activate the new conda environment by typing:
conda activate bpss-prime-minister
After activating, each command line prompt should start with (bpss-prime-minister) .
Now you need to install the library requirements which are stored in requirements.txt. Normally you would type conda install --file requirements.txt or even leave it for PyCharm to automatically install requirements, but in this case conda has problems installing flask_bootstrap and python-dotenv. To solve these issues I have decided to use pip to install all the requirements. PyCharm Terminal has already put me in the correct directory so I can just use the filename without the path.
pip install -r requirements.txt
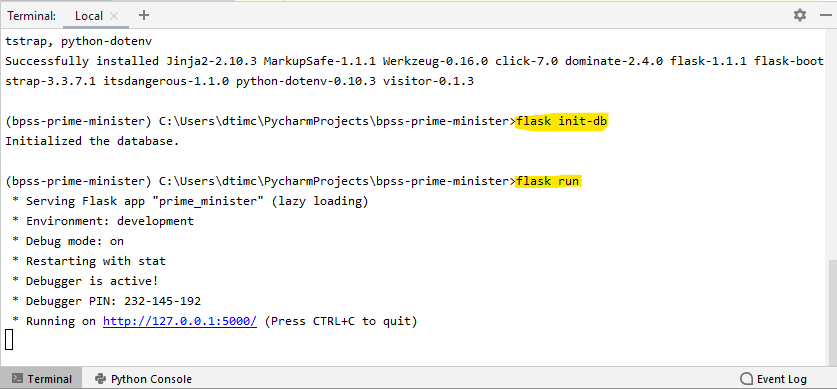
11. After all the requirements are installed you can launch the app. The first command is a custom command defined by the app to initialise the database. In Terminal type:
flask init-db
The second command launches the app in a dev only web server. In Terminal type:
flask run
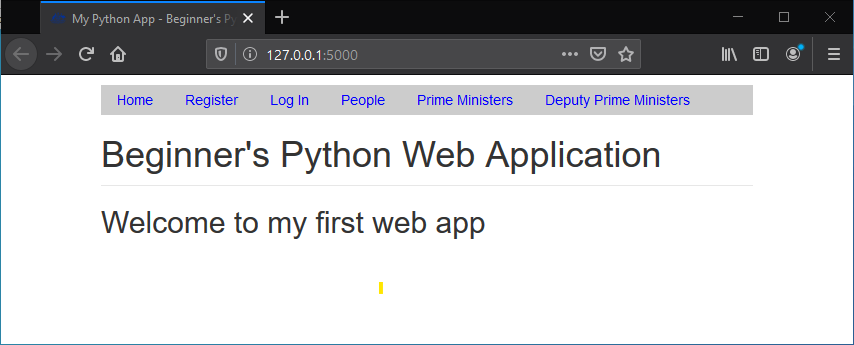
12. You can click on the displayed hyperlink in Terminal, or open a web browser such as Firefox and type in the address.
Congratulations. You are now running a flask web application on your Windows computer using only Anaconda and PyCharm. To stop the application, go back to Terminal and type ctrl-c, by holding down the “Ctrl” key, pressing the “c” key, and then releasing both keys.