On their website, Flask provide a simple “Hello World!” demo that you can run from the command line. I have written this post to show how the same thing can be achieved using PyCharm Edu. It is more steps, but once it is set up, the web application can be run by a menu item or keystroke in PyCharm Edu without ever having to use the terminal. Jetbrains recommend PyCharm Professional for Flask development work but with this technique all you need is one of the free IDEs PyCharm Edu or PyCharm Community.
TL;DR (too long; didn’t read)
If you are already familiar with PyCharm Edu, the steps are essentially:
Create a new python project with a virtual environment, and “Flask” in your requirements.txt file.
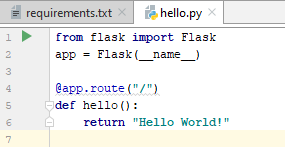
Create a new Python file hello.py as per the Flask demo.
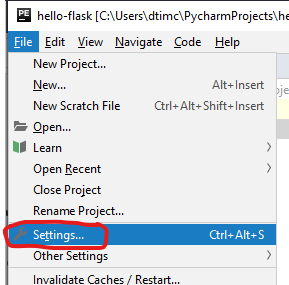
If you are using PyCharm Edu you will need to enable the “Run” menu.
These screen shots have been taken from PyCharm Edu 2019.1 using Python 3.7.3 on Windows 10 Pro.
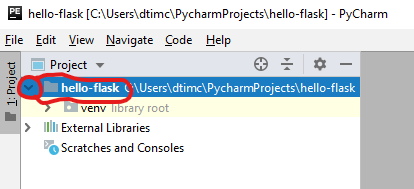
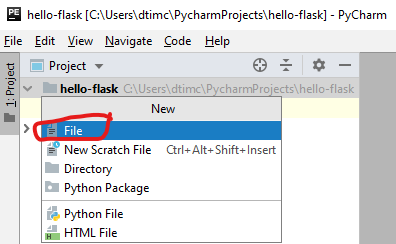
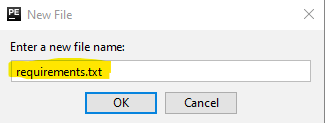
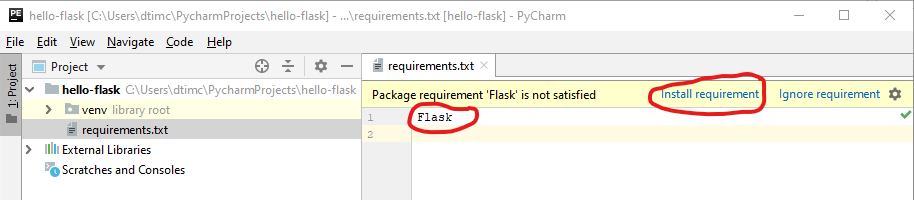
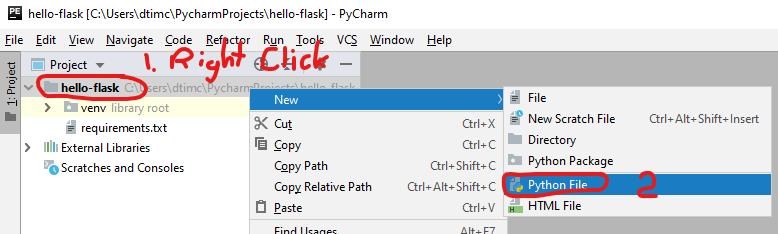
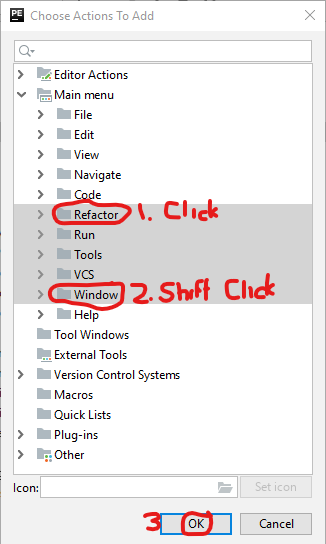
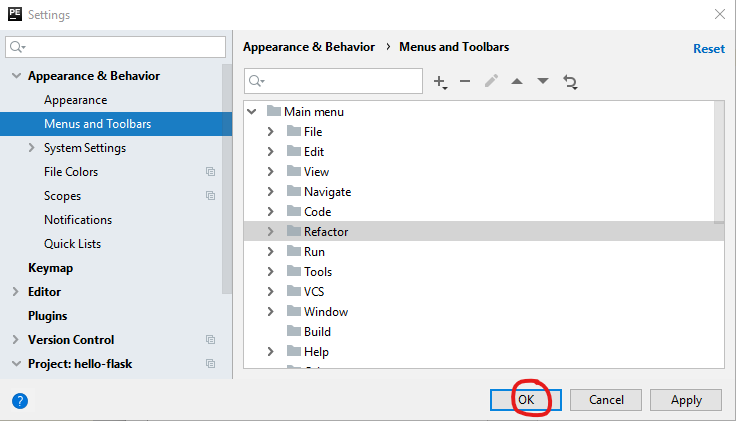
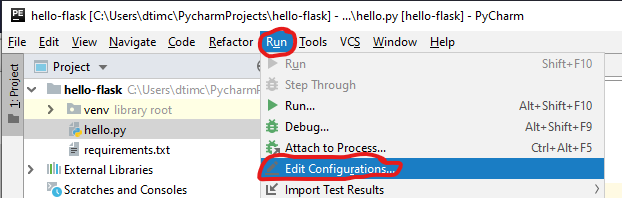
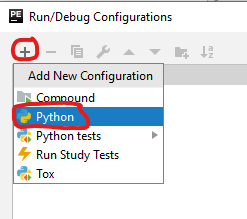
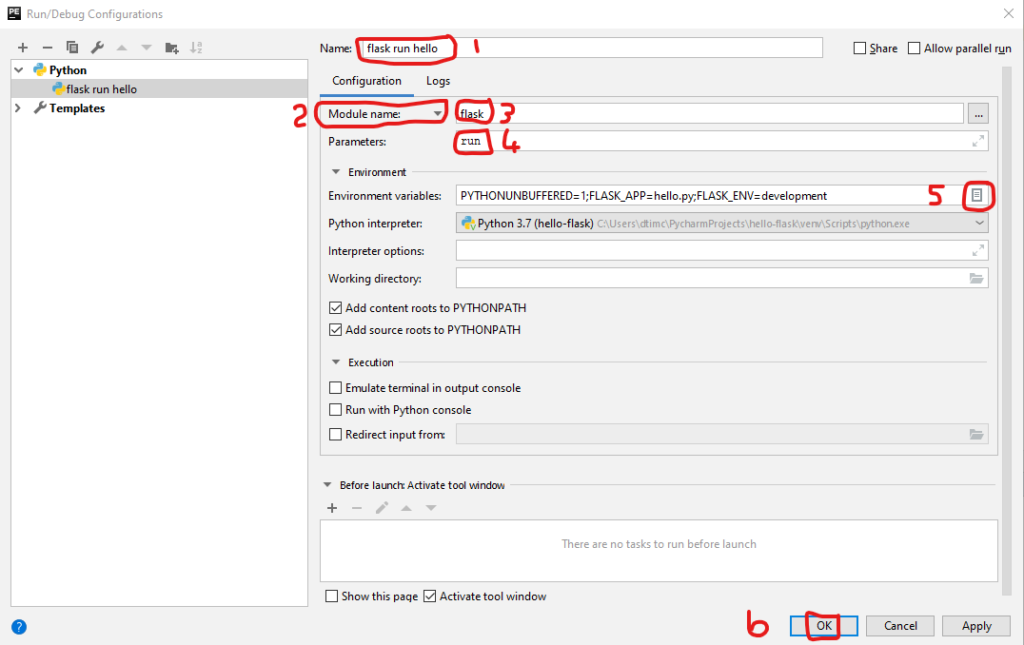
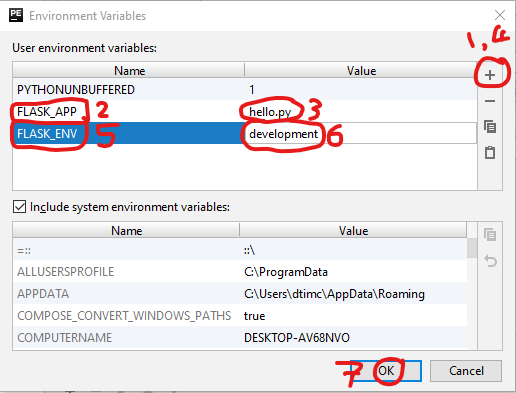
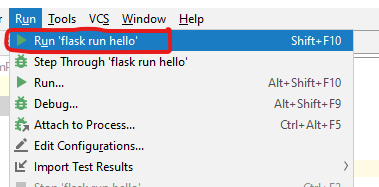
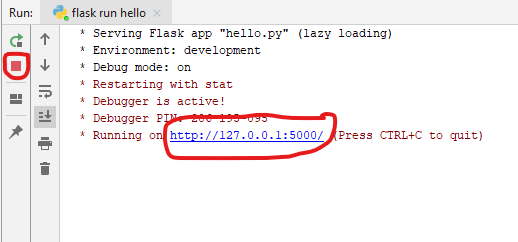
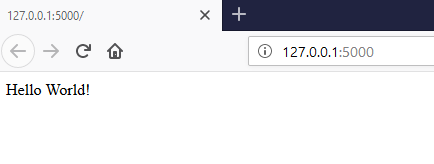
Create a new project in PyCharm EduName your project “hello-flask”. This will also create a new virtual environment.Click on “hello-flask” to select the project folder. Then click on > next to “hello-flask” to expand the folder and show the contents. Depending on where you are saving your virtual environments you may or may not see “venv”.Now that the project folder is selected, you can select “New…” from the “File” menu to create a new file in the project folder.A floating menu will appear asking you the type of file. We are creating a text file so choose “File” which can be used for any file type.Name the file requirements.txt and click “OK”.In the requirements.txt type the word “Flask”. This replaces the step “pip install Flask” from the command line demo. After you have typed in “Flask” click on the recommendation to “Install requirement”. The recommendation may not come straight away so continue on to the next steps and it should appear before you get to running the web application.To create a new Python file, right click on the project folder and select New > Python File.Because PyCharm knows it is going to be a Python file, we don’t need to type in .py on the end. Just type in the name “hello” and click “OK”.In hello.py, type in the code from the Flask “Hello World!” demo. The file will get saved automatically.If you are using PyCharm Community Edition you can skip the next three steps which are only required to enable some menus which are hidden in PyCharm Edu but visible in PyCharm Community Edition. Click on “Settings…” in the “File” menu. On Mac this menu is called “Preferences”.The main menu is missing some menus so: 1. Expand “Appearance and Behaviour” 2. Select “Menus and Toolbars” 3. Expand “Main menu” 4. Select “Code” menu so we can add new menus after it 5. Click on “+” to add extra menus 6. Click “Add Action…”Select all menus between “Refactor” and “Window” and click on “OK”.The menus are now included so click “OK”To run a flask app we need to create a “run configuration”. Select “Edit configurations…” from the “Run” menu.Click “+” to add a new configuration and select “Python”.1. Name your configuration “flask run hello” or something else if you prefer. 2. Change label from “Script path:” to “Module name:” 3. Type “flask” as the module name 4. Type “run” as the parameter 5. Configure environment variables by clicking box. (See next screenshot) 6. After setting environment variables (next screenshot), click “OK”1. “+” to add a new environment variable 2. Name it “FLASK_APP” 3. Give it value “hello.py” 4. “+” to add another environment variable 5. Name it “FLASK_ENV” 6. Give it value “development” 7. Click “OK” to return to previous dialog box and click “OK” again.Now you can run the builtin web application server by selecting “Run ‘flask run hello'” from the Run menu. If the first item does not say ‘flask run hello’ then choose “Run…” (third item in menu) and select ‘flask run hello’ from the popup menu.A run status pane will open at the bottom of the screen. You can click on the URL to see the outpu of your web application in a web browser. Click the red square to stop your application.This is what your web browser should show you. Yay!!! 🙂